Published on Feb. 08, 2016 | Last updated on Apr. 08, 2025
ChannelReply makes Gorgias-, Freshdesk- or Zendesk-Amazon integration a cinch. Start by connecting your helpdesk by following the instructions for Gorgias, Freshdesk or Zendesk. Then follow along with the written instructions or video below, and you’ll have your Amazon messages in your favorite helpdesk in no time!
Important: This article uses the classic ChannelReply interface. You can access the classic interface here.
Note: Click on any screenshot to see the full-sized image. Article last updated 2/4/2020; some statements in the video are outdated, but its instructions still work for setting up your account.
1. Sign In
Sign in to your ChannelReply account by clicking “Sign In” in the upper-right corner of the screen. If you don’t have an account yet, just click "Start Free 14-Day Trial" to get started.
2. Go to “Amazon Settings”
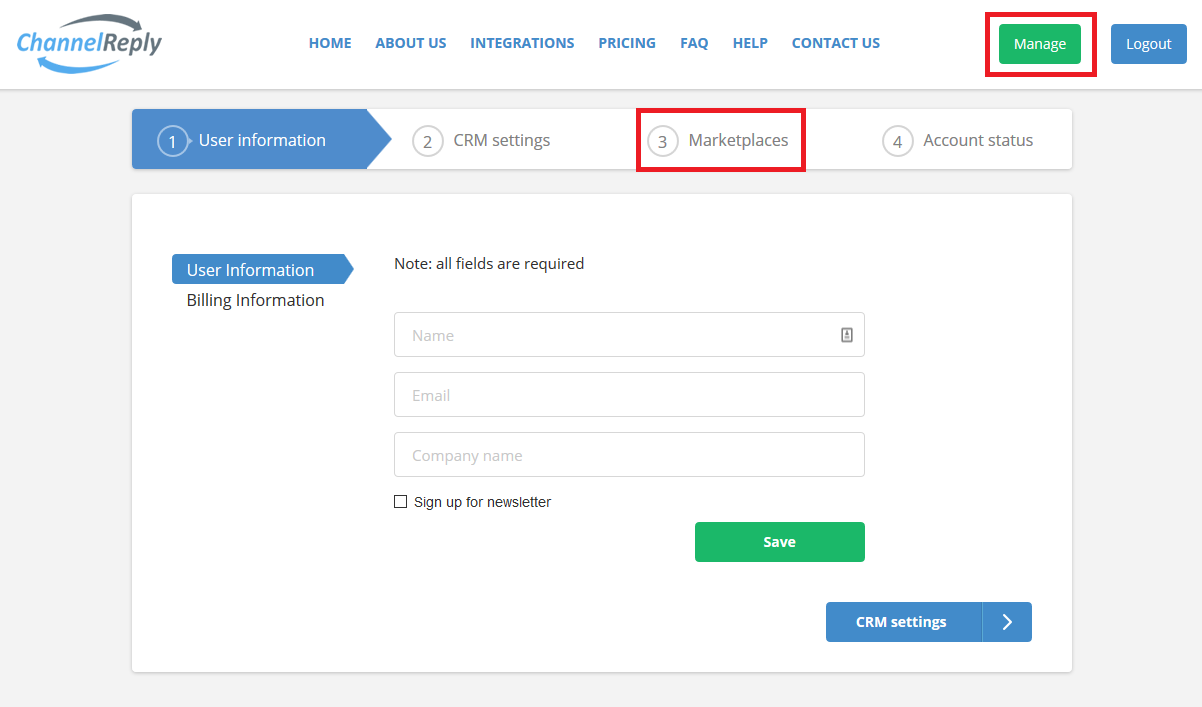
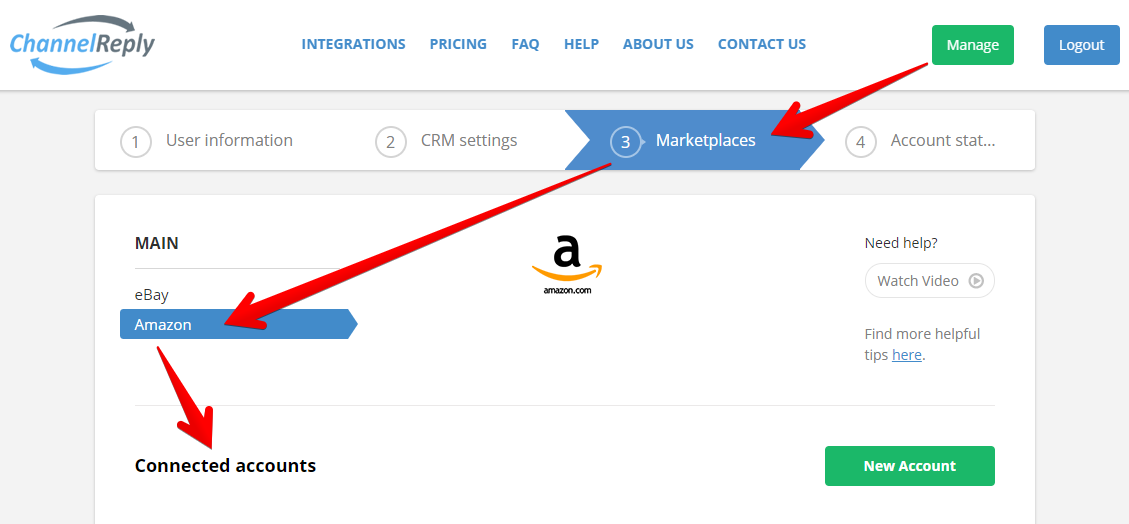
You should arrive at the screen shown below after signing in. You can also reach it by clicking “Manage.” Once you’re there, click “Marketplaces” to begin setting up your Amazon account.
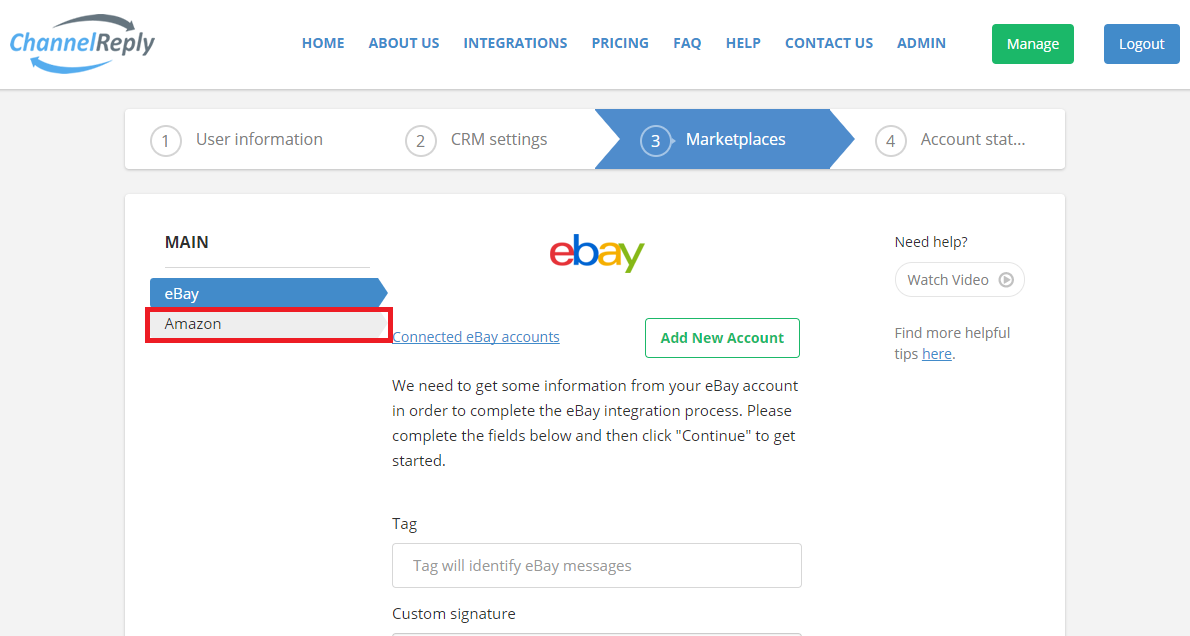
Click “Amazon.”
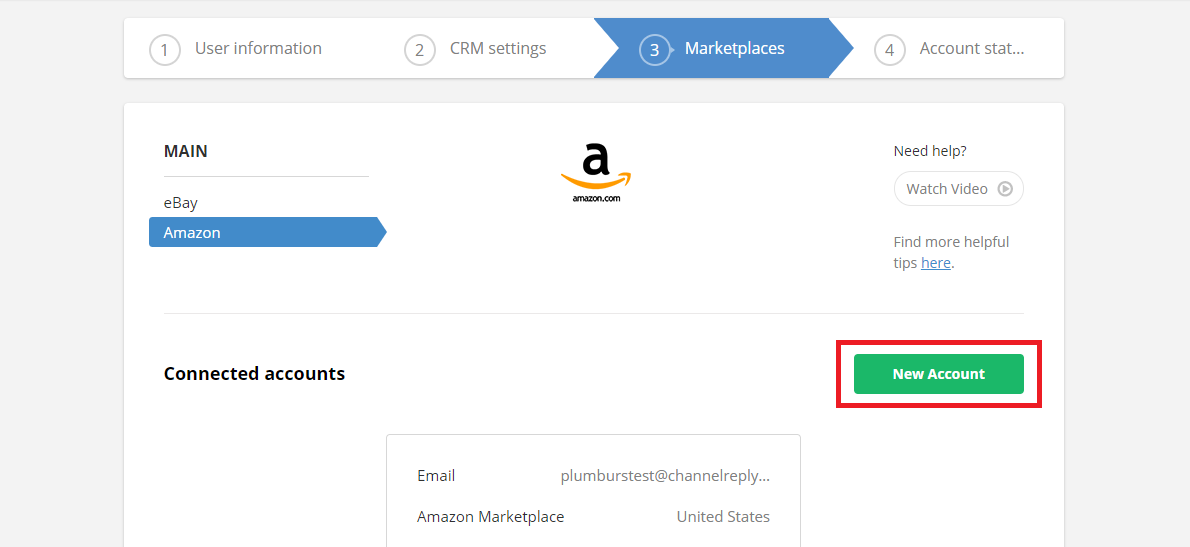
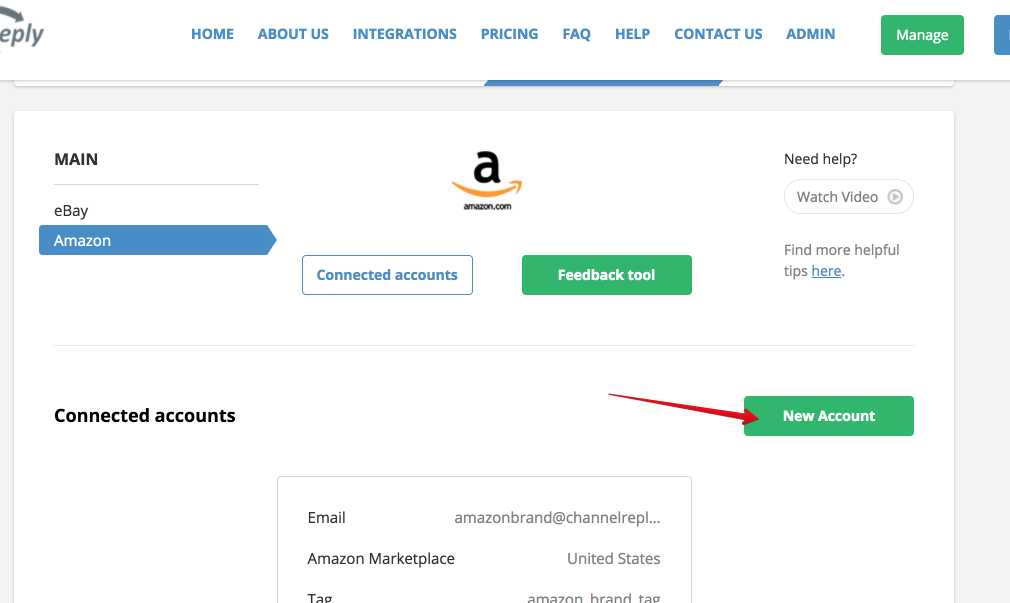
You will arrive on the "New Account" screen. If you have previously connected Amazon accounts with ChannelReply, you will see the "Connected accounts" screen instead, in which case you should click "New Account" to get started.
3. Select an Amazon Account & Customize Your Settings
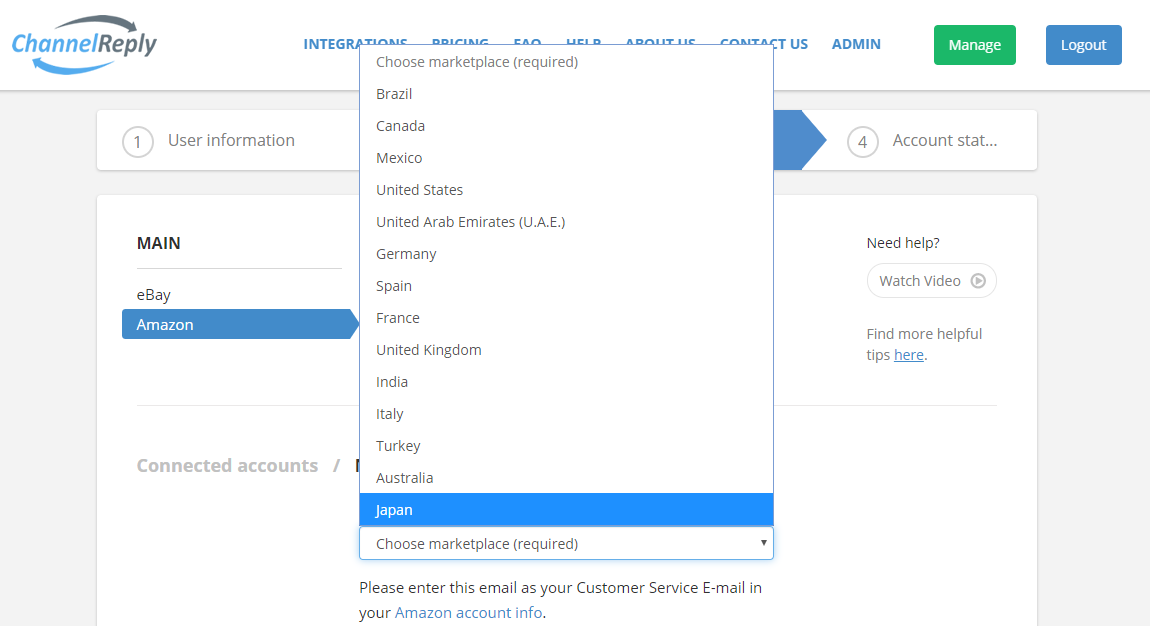
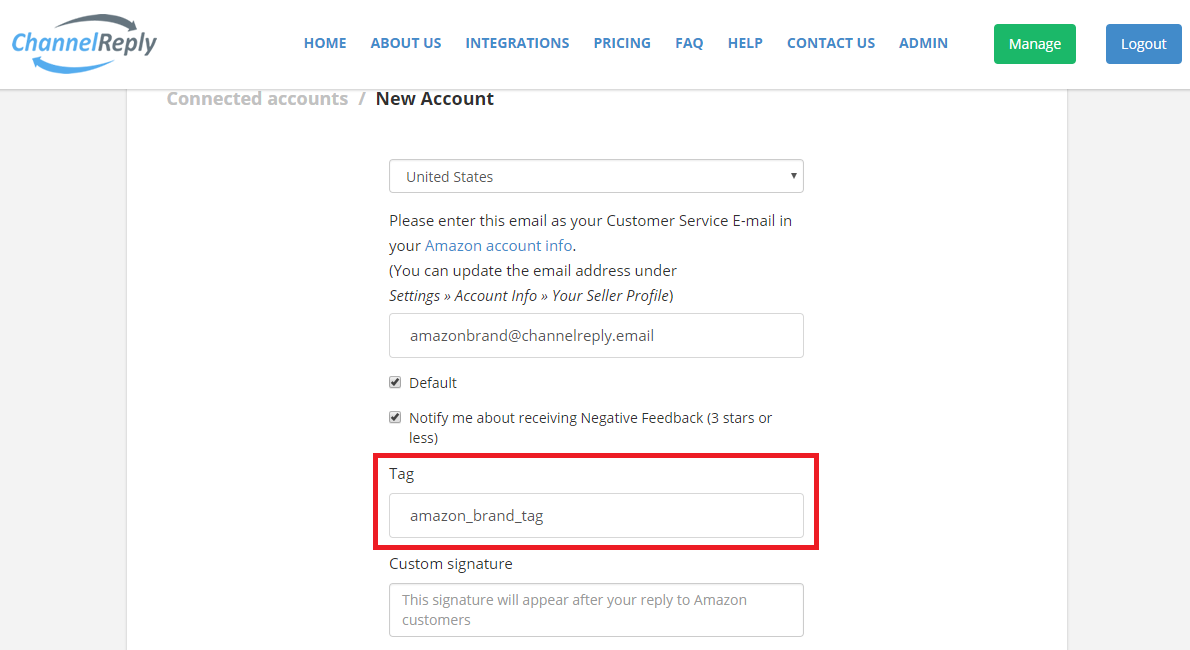
Click “Choose marketplace (required)” and select a country associated with the Amazon account you wish to connect. Note that connecting one North America, Europe or Far East account will allow you to connect all countries within that region, and you do not need to integrate every marketplace separately. (We'll explain more later.)
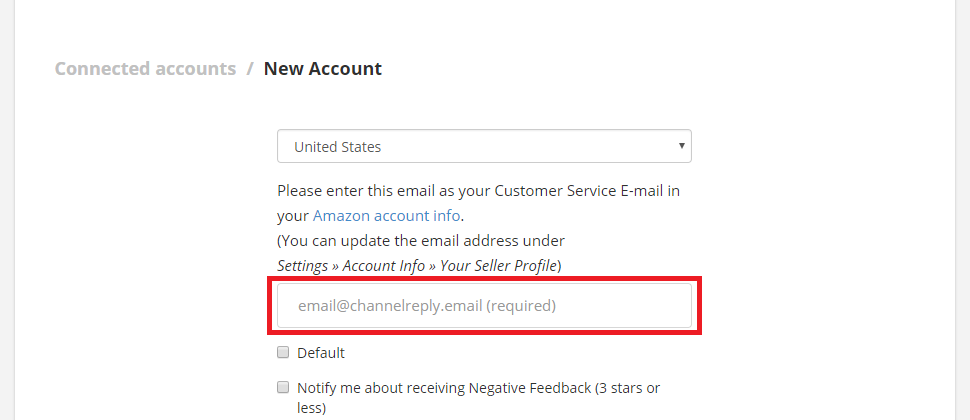
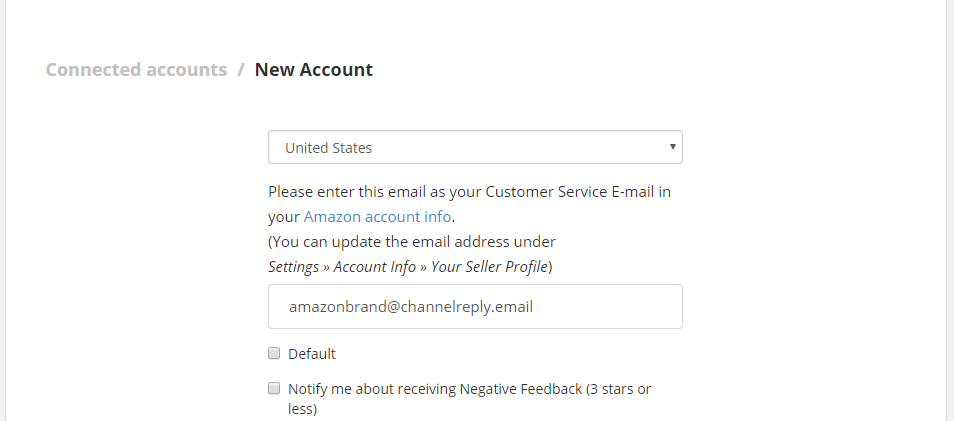
Next, create your new support email. Simply enter a username and @channelreply.email will automatically be added to the end.
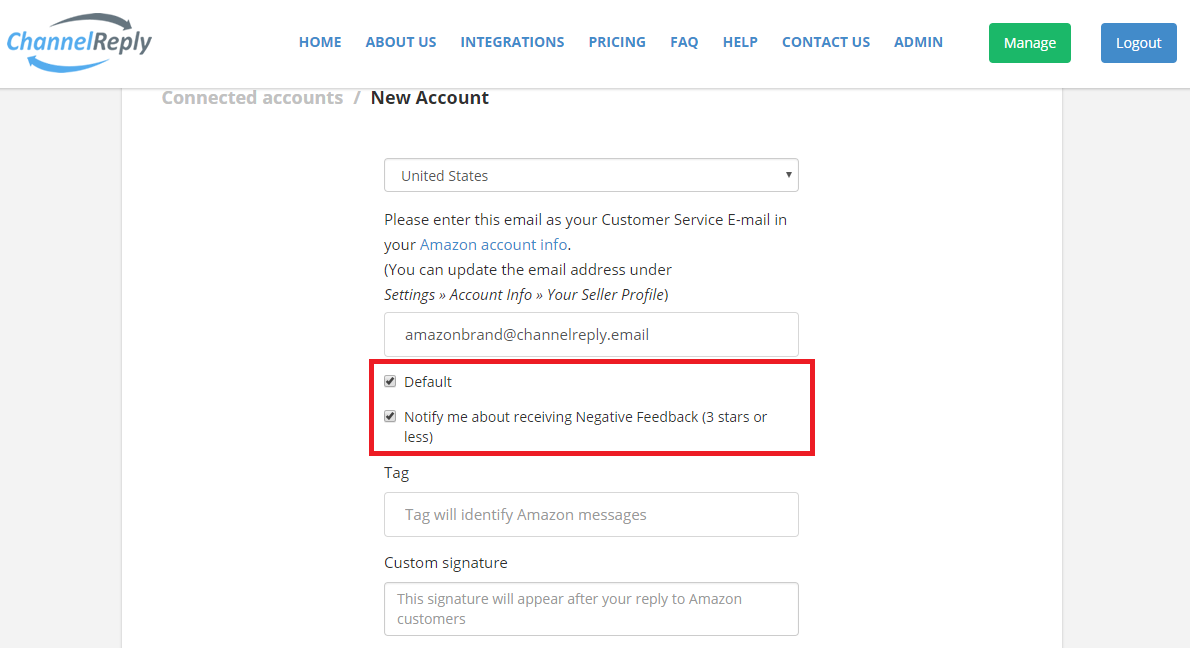
Checking off the “Default” option will set this account as the one your helpdesk uses when you initiate conversations with Amazon customers. Be sure to check it off if this is your only Amazon account. If you have more than one Amazon account, choose only one of them to set as your default.
You can also choose to receive negative feedback notifications for this Amazon account. This feature comes at no extra charge, but the notifications do count toward your monthly message limit.
Next, enter a tag for this Amazon account. In your helpdesk, this tag will identify every message you receive from this account.
Be careful about using spaces in tags. If you enter something like "Amazon US," you may end up with the separate tags "Amazon" and "US" in your helpdesk.
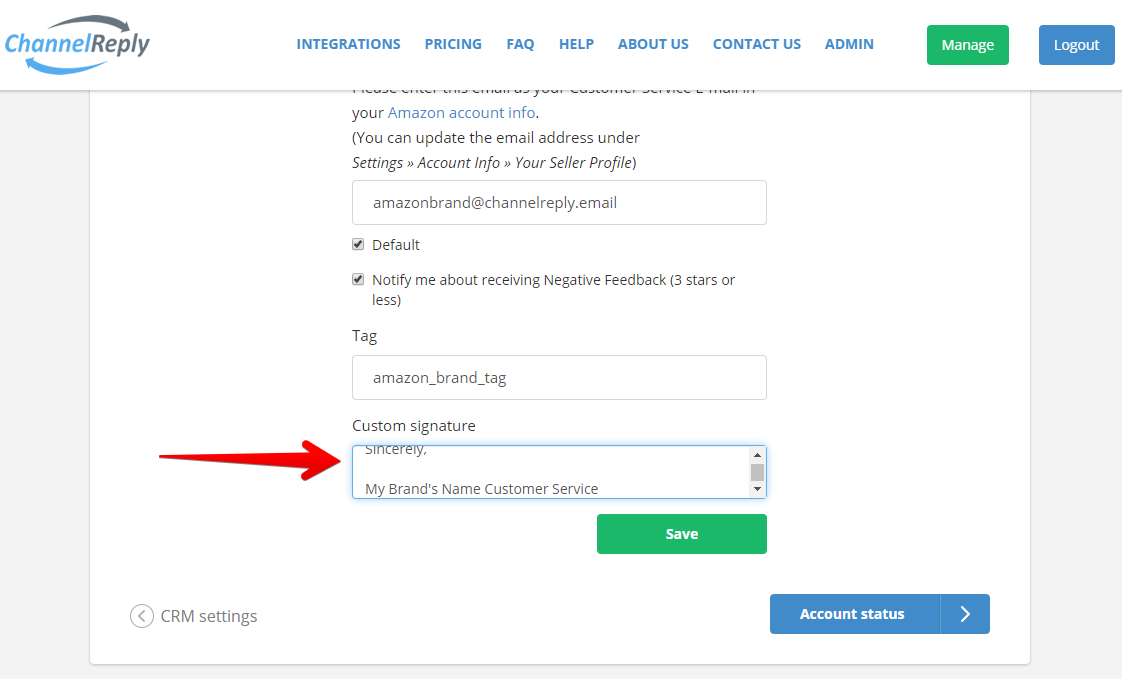
You can also enter a custom signature that will appear at the end of every reply you send. Note that this will appear in addition to the signature in your helpdesk, if you have one.
Be careful to avoid including any links that would violate Amazon policy in any signature. That goes for any signature in your helpdesk and any you create in ChannelReply.
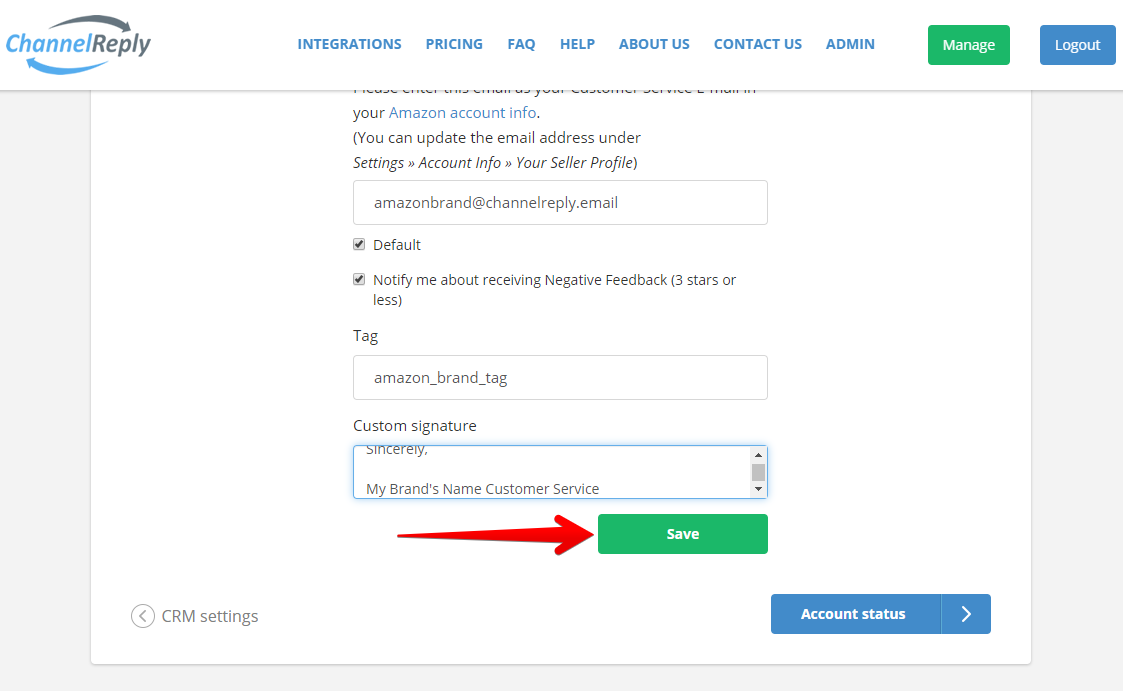
Once finished, click “Save” to finalize this information. This will take you to Amazon Seller Central.
4. Give Us Permission to Access Your Account as a Developer
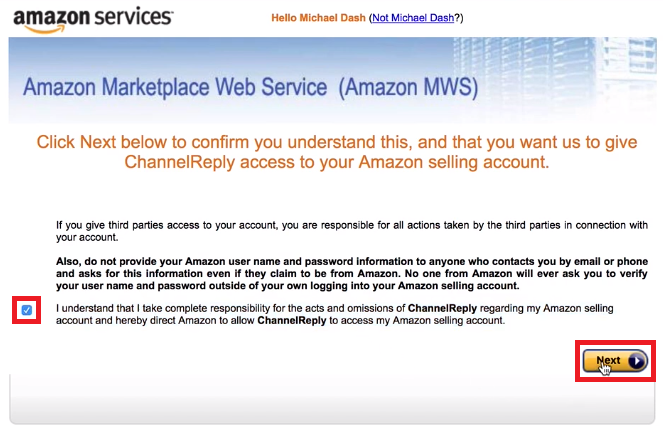
Sign in to your Amazon seller account. You will be shown an Amazon Marketplace Web Services agreement authorizing ChannelReply to integrate with your account. To agree to the terms and continue setup, check the box and then click “Next.”
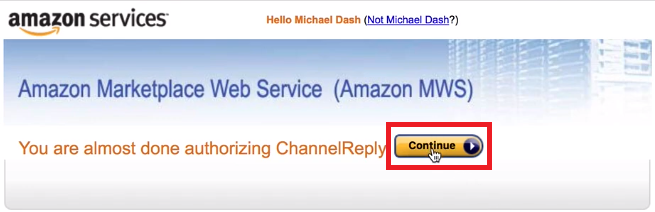
All you need to do on the next screen is click “Continue” to return to our website.
5. Update Your Email Addresses
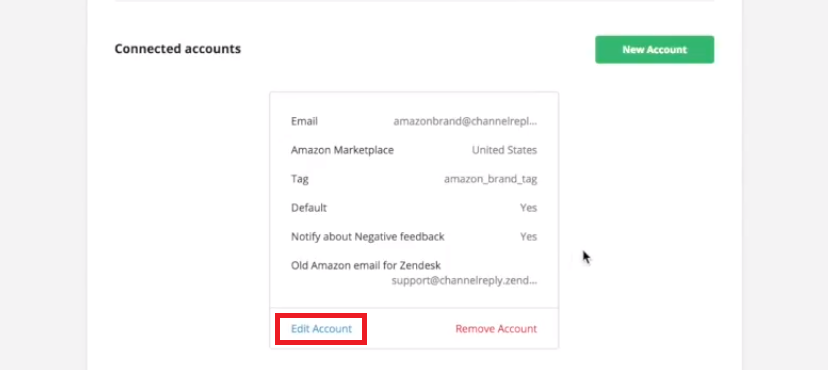
You’ll be brought back to the “Connected accounts” page. You should now see info about the Amazon account you’ve just integrated with ChannelReply.
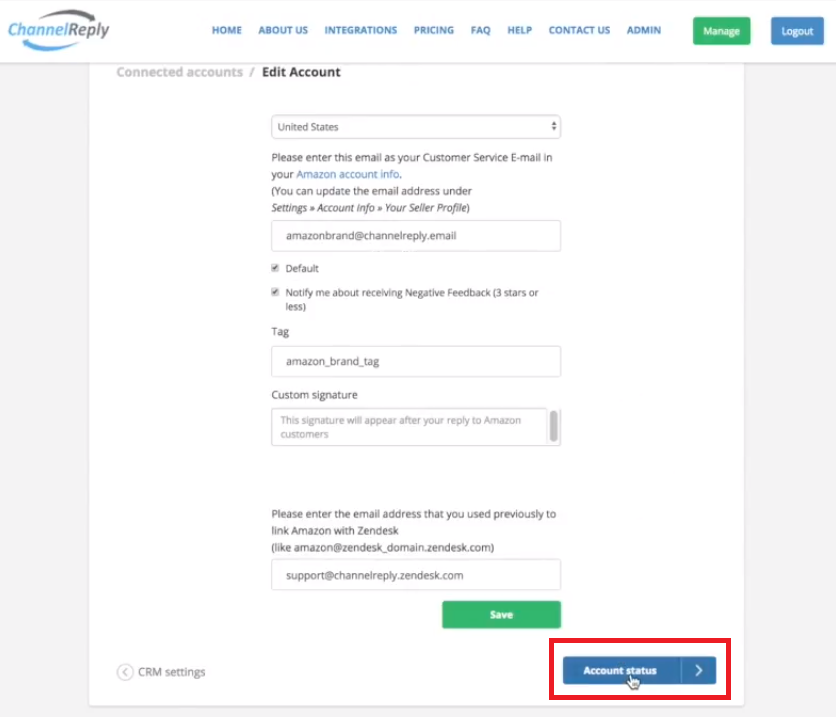
Before ChannelReply can begin managing your Amazon messages, we need to configure your Amazon support email. Click “Edit Account.”
Copy your ChannelReply email address to your clipboard. Next, go back to your Amazon Seller Central account.
Make sure the marketplace you wish to integrate is displayed or selected at the top of the screen. For example, we want to integrate Amazon US, so we've made sure our screen displays Amazon.com. (You may have a dropdown menu here that allows you to switch between marketplaces.)
Click “Settings,” then "Notification Preferences."
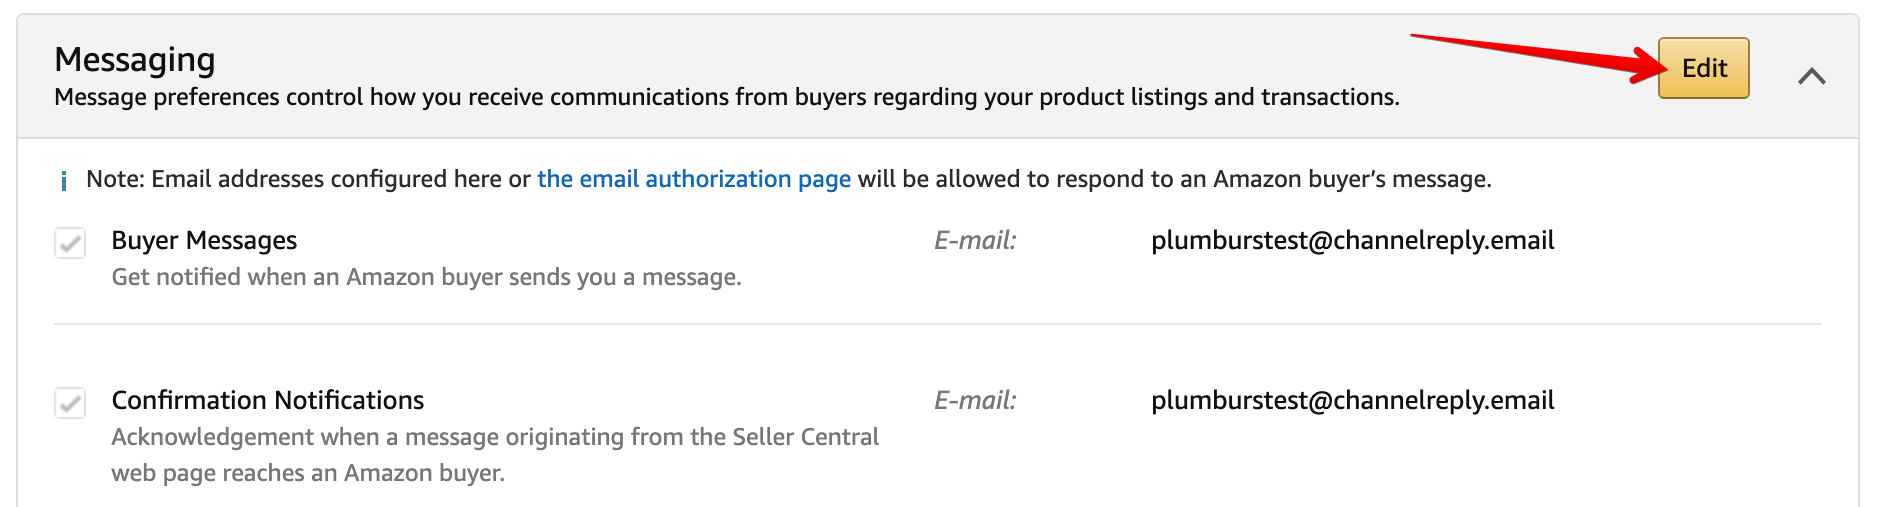
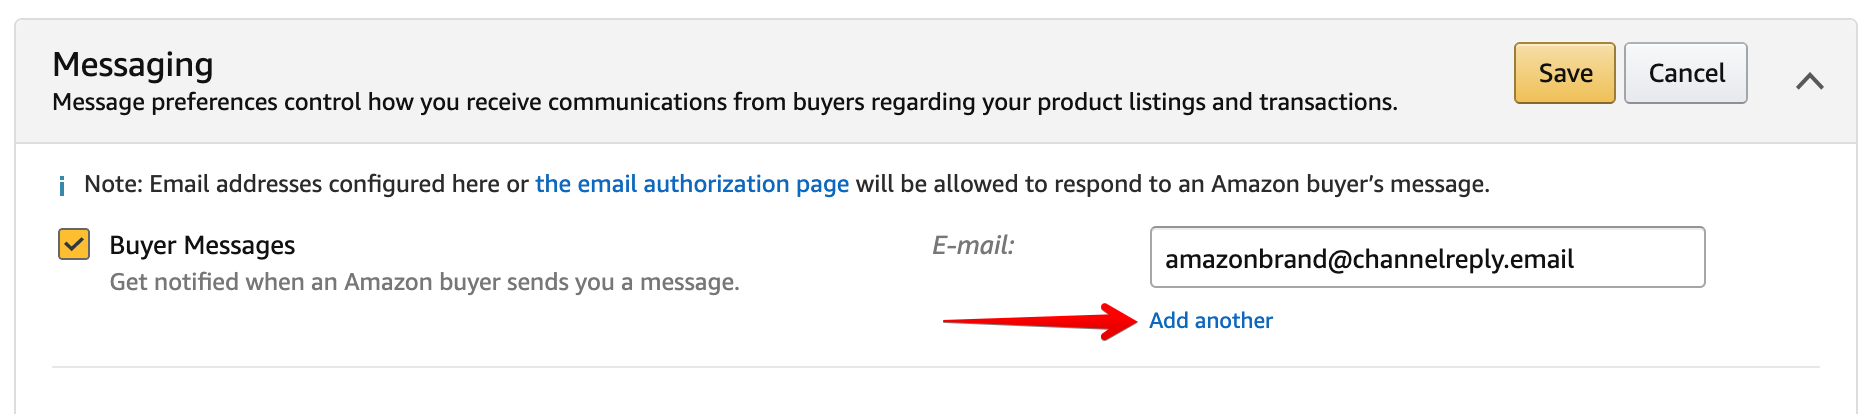
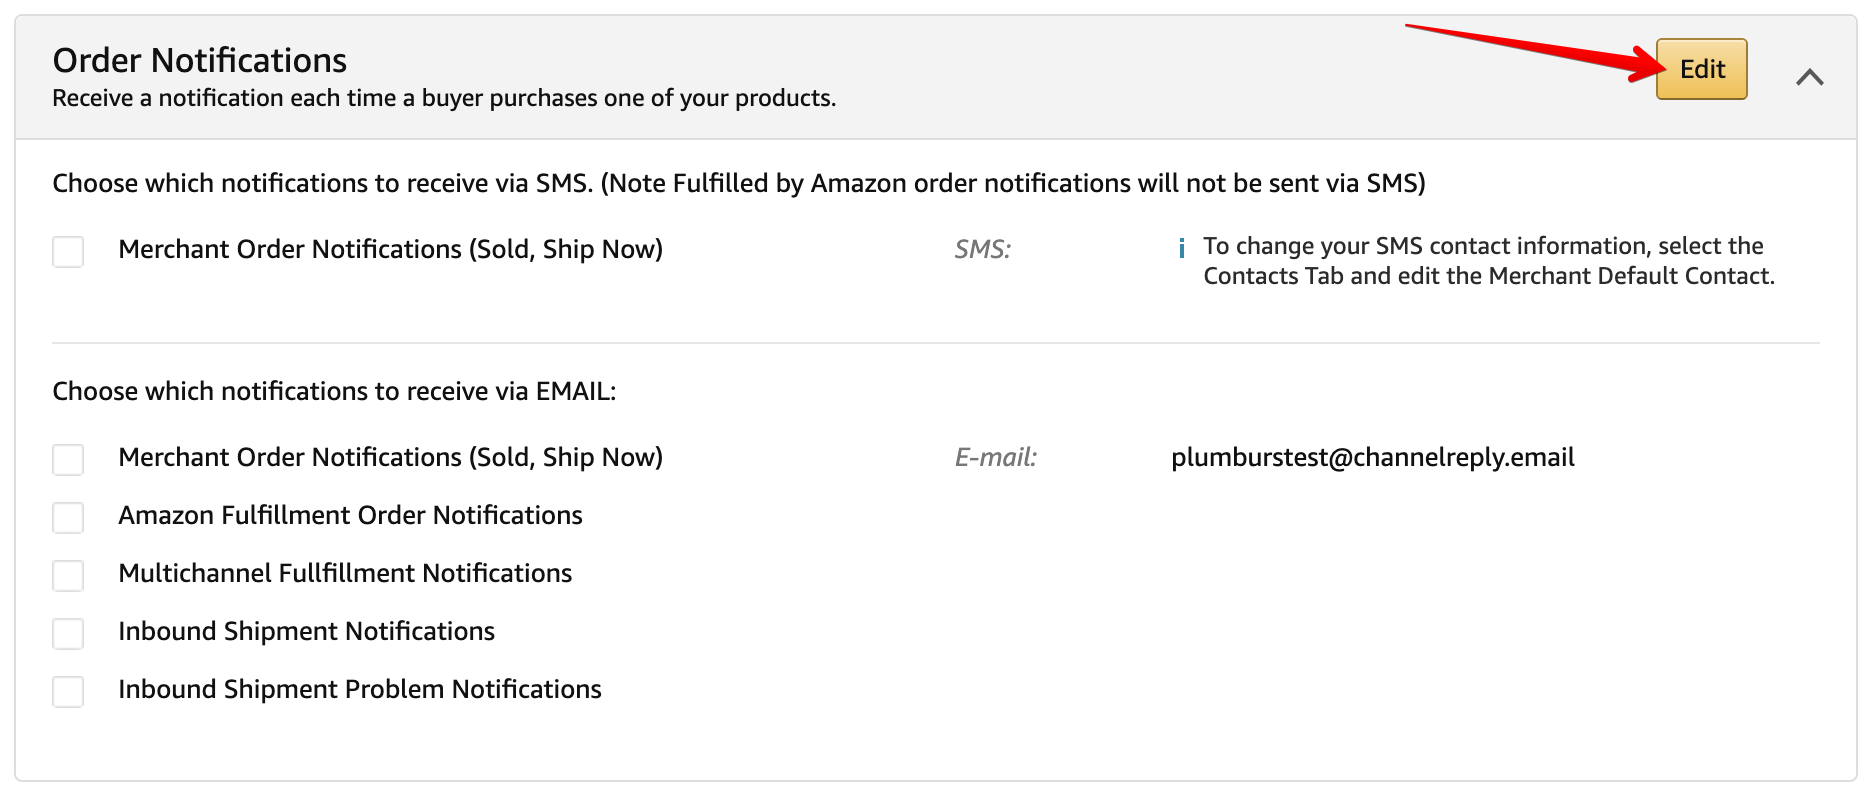
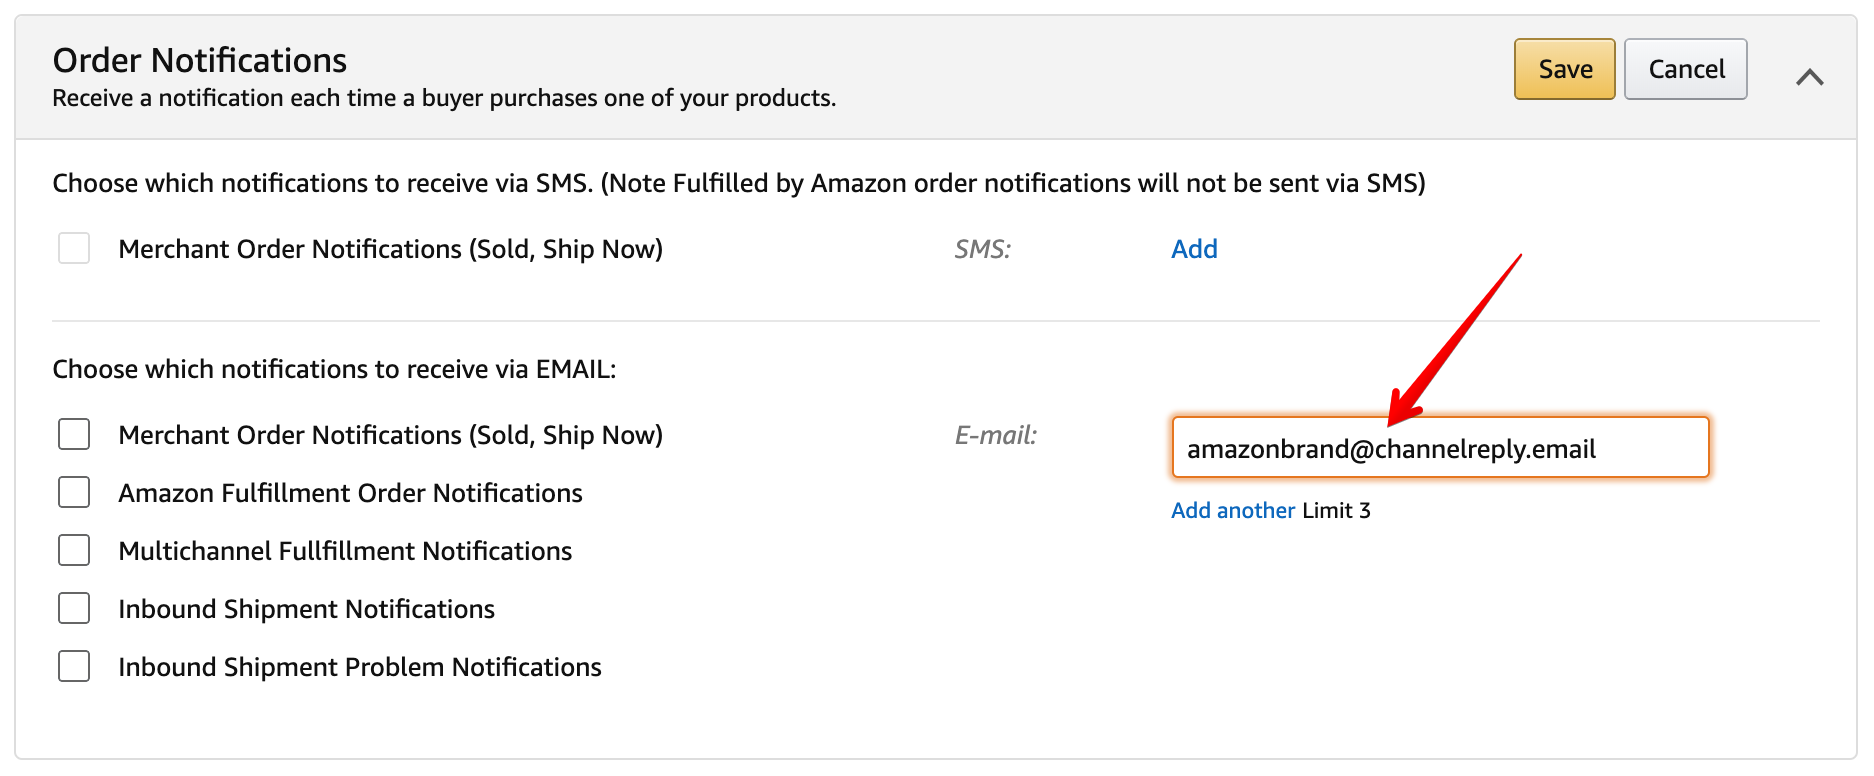
Scroll down to “Messaging.” See if your @channelreply.email address is listed as the email for “Buyer Messages.” If it isn’t, simply click the orange-yellow “Edit” button to the right of “Messaging.” Then enter your ChannelReply email in the “Buyer Messages” field.
After clicking “Edit,” you can also add your old support email as a second address if you still want to receive buyer messages there. (Just be careful to avoid entering any other address that will deliver messages to your helpdesk.)
You’ve now integrated messaging with your Amazon customers!
Optional: Enable Notification Delivery
If you want, you can also choose to have ChannelReply deliver your one-way Amazon notifications. That way, if a notification is relevant to a specific customer and/or order, you’ll see all that data in the ChannelReply app.
To have ChannelReply manage delivery for any kind of one-way notification, simply click the appropriate “Edit” button and replace the old email with your ChannelReply address.
Just note that all messages delivered through your ChannelReply address will count toward your monthly message limit. You can forward messages straight to your helpdesk to avoid this, as described in "How to Forward Amazon Notifications to Your Helpdesk."
If you ever need to make changes, you can return to this page by logging in to Amazon Seller Central and clicking Settings -> Notification Preferences.
6. Enable Service
Return to your ChannelReply account and click “Account status.”
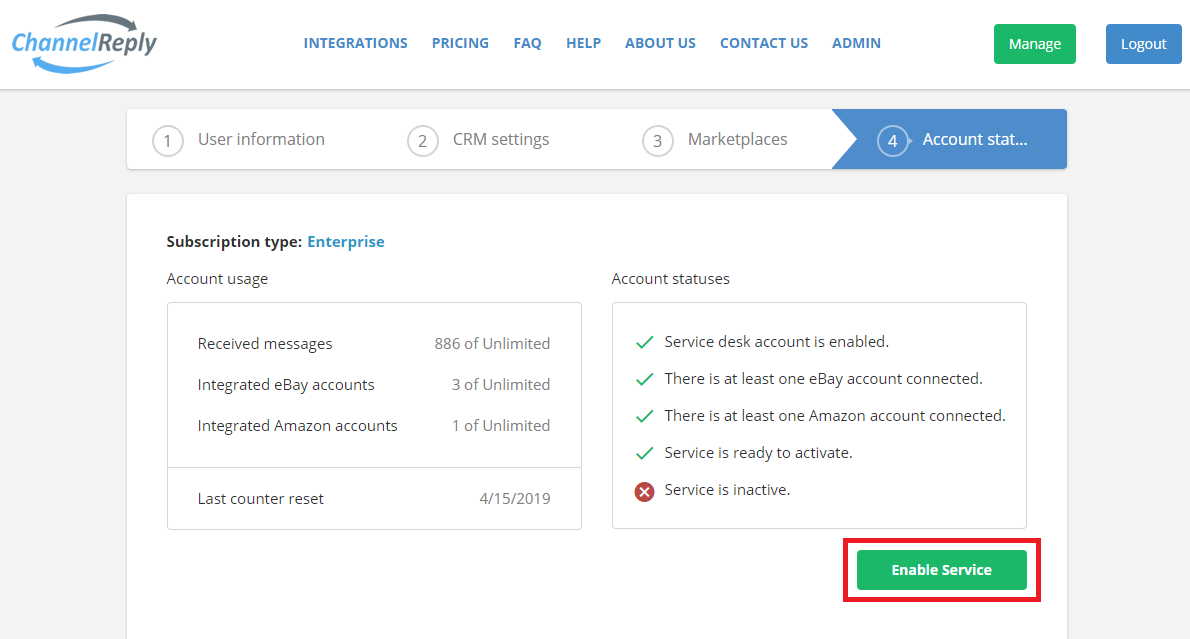
Here you can see account stats and enable or disable service. If you see a “Disable Service” button, your account is currently running. If you see “Enable Service,” click the button now.
Congratulations! You have now integrated your Amazon account with ChannelReply. We’ll start sending Amazon messages to your helpdesk (Zendesk, Freshdesk or Gorgias) presently.
Managing Your Account
Need to see account details or make changes? Simply sign in to your ChannelReply account and go to Marketplaces > Amazon. You can review and edit your details under “Connected accounts” anytime.
Adding More Countries, Regions or Accounts
You can add more countries in the same region by repeating Step 5 for those countries. Here's the full list of supported regions and the countries they contain:
North America: Canada, the US, Mexico, and Brazil.
Europe: The UK, the Netherlands, France, Germany, Spain, Italy, Turkey, the UAE, India, Egypt, and Saudi Arabia.
Far East: Australia, Japan, and Singapore.
You do not need to complete a separate integration for countries in the same region unless you use a different Seller Central login for them.
To add a new region or connect an account with a different Seller Central login, click “New Account” and follow these instructions from the beginning.
When Will I See My Messages and Customer/Order Info?
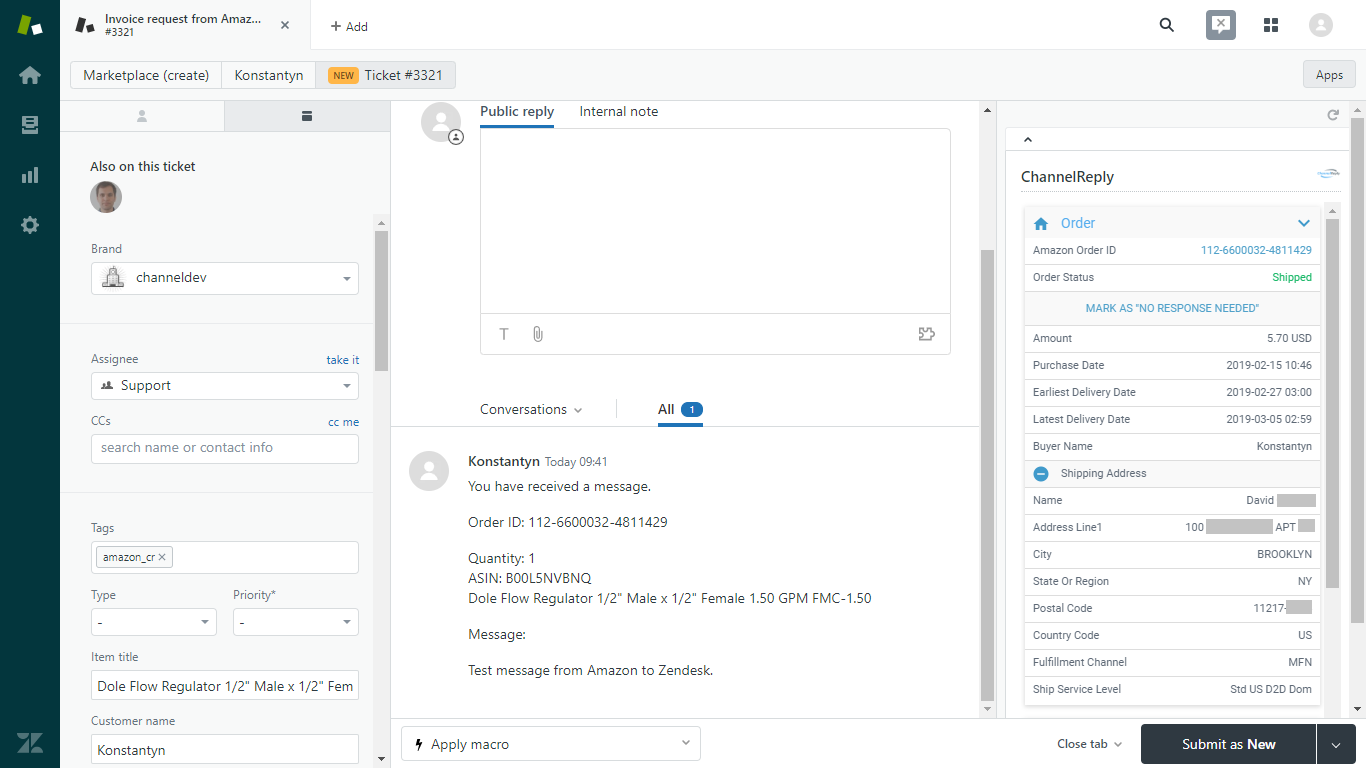
All new Amazon messages will be delivered to your helpdesk immediately, and you should see the ChannelReply app on all messages.
The ChannelReply app in Zendesk. The app looks different in other helpdesks, but it always contains the same information and is available in the right-hand sidebar.
However, customer and order info may not be automatically displayed on the first few messages you receive.
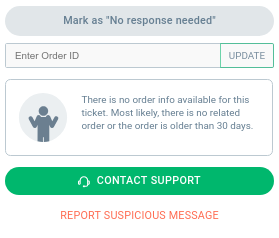
This happens because ChannelReply collects this data from the first message in each conversation with an Amazon customer. If the first message in a conversation is not processed by ChannelReply, the info cannot be displayed automatically. So, it's common to see no order info at first, but after a couple weeks it will be displayed on most or all messages.
If no info is shown, Zendesk and Freshdesk users can manually enter the message's order ID.
That lets you see all data on Amazon conversations that started before you set up ChannelReply.
We hope you enjoy your simplified customer service experience! If you run into trouble or need any assistance with Amazon integration, please don’t hesitate to contact us. We’re always happy to hear from you!


 Amazon
 eBay
eBay
 Shopify
 Walmart
 Back Market
 Newegg
 Etsy
Etsy
 WooCommerce
 Zendesk
 Freshdesk
 Help Scout
 Gorgias
 Re:amaze
 Zoho Desk
 Kustomer
 Onsite
 Help Center
 FAQ
FAQ
 Blog
Blog